This page is a blog style behind the curtain explanation for how I’ve tackled various features in Wake. Below I explain my approach, work-flow, tools, etc for developing the game.
The topics covered so far are as follows:
Multi-Channel Shader
World Aligned Texture
Furniture Asset
NPC Dialogue
Multi-Channel Shader
I’ve been facing a recurring issue when tackling larger game objects like buildings or geographic features where I want to have more variety in texture than a 4k tiled material can give me but when I would try to paint details even a 16k texture would come out looking pixelated on top of being an insanely large file.
The other day though I was watching a time-lapse video of someone making a scene in blender and saw them painting details like dirt or grass onto an object in their scene in Texture Paint mode. I paused while they had their material window open and saw them using what I found out from Google later to be an RGB map.
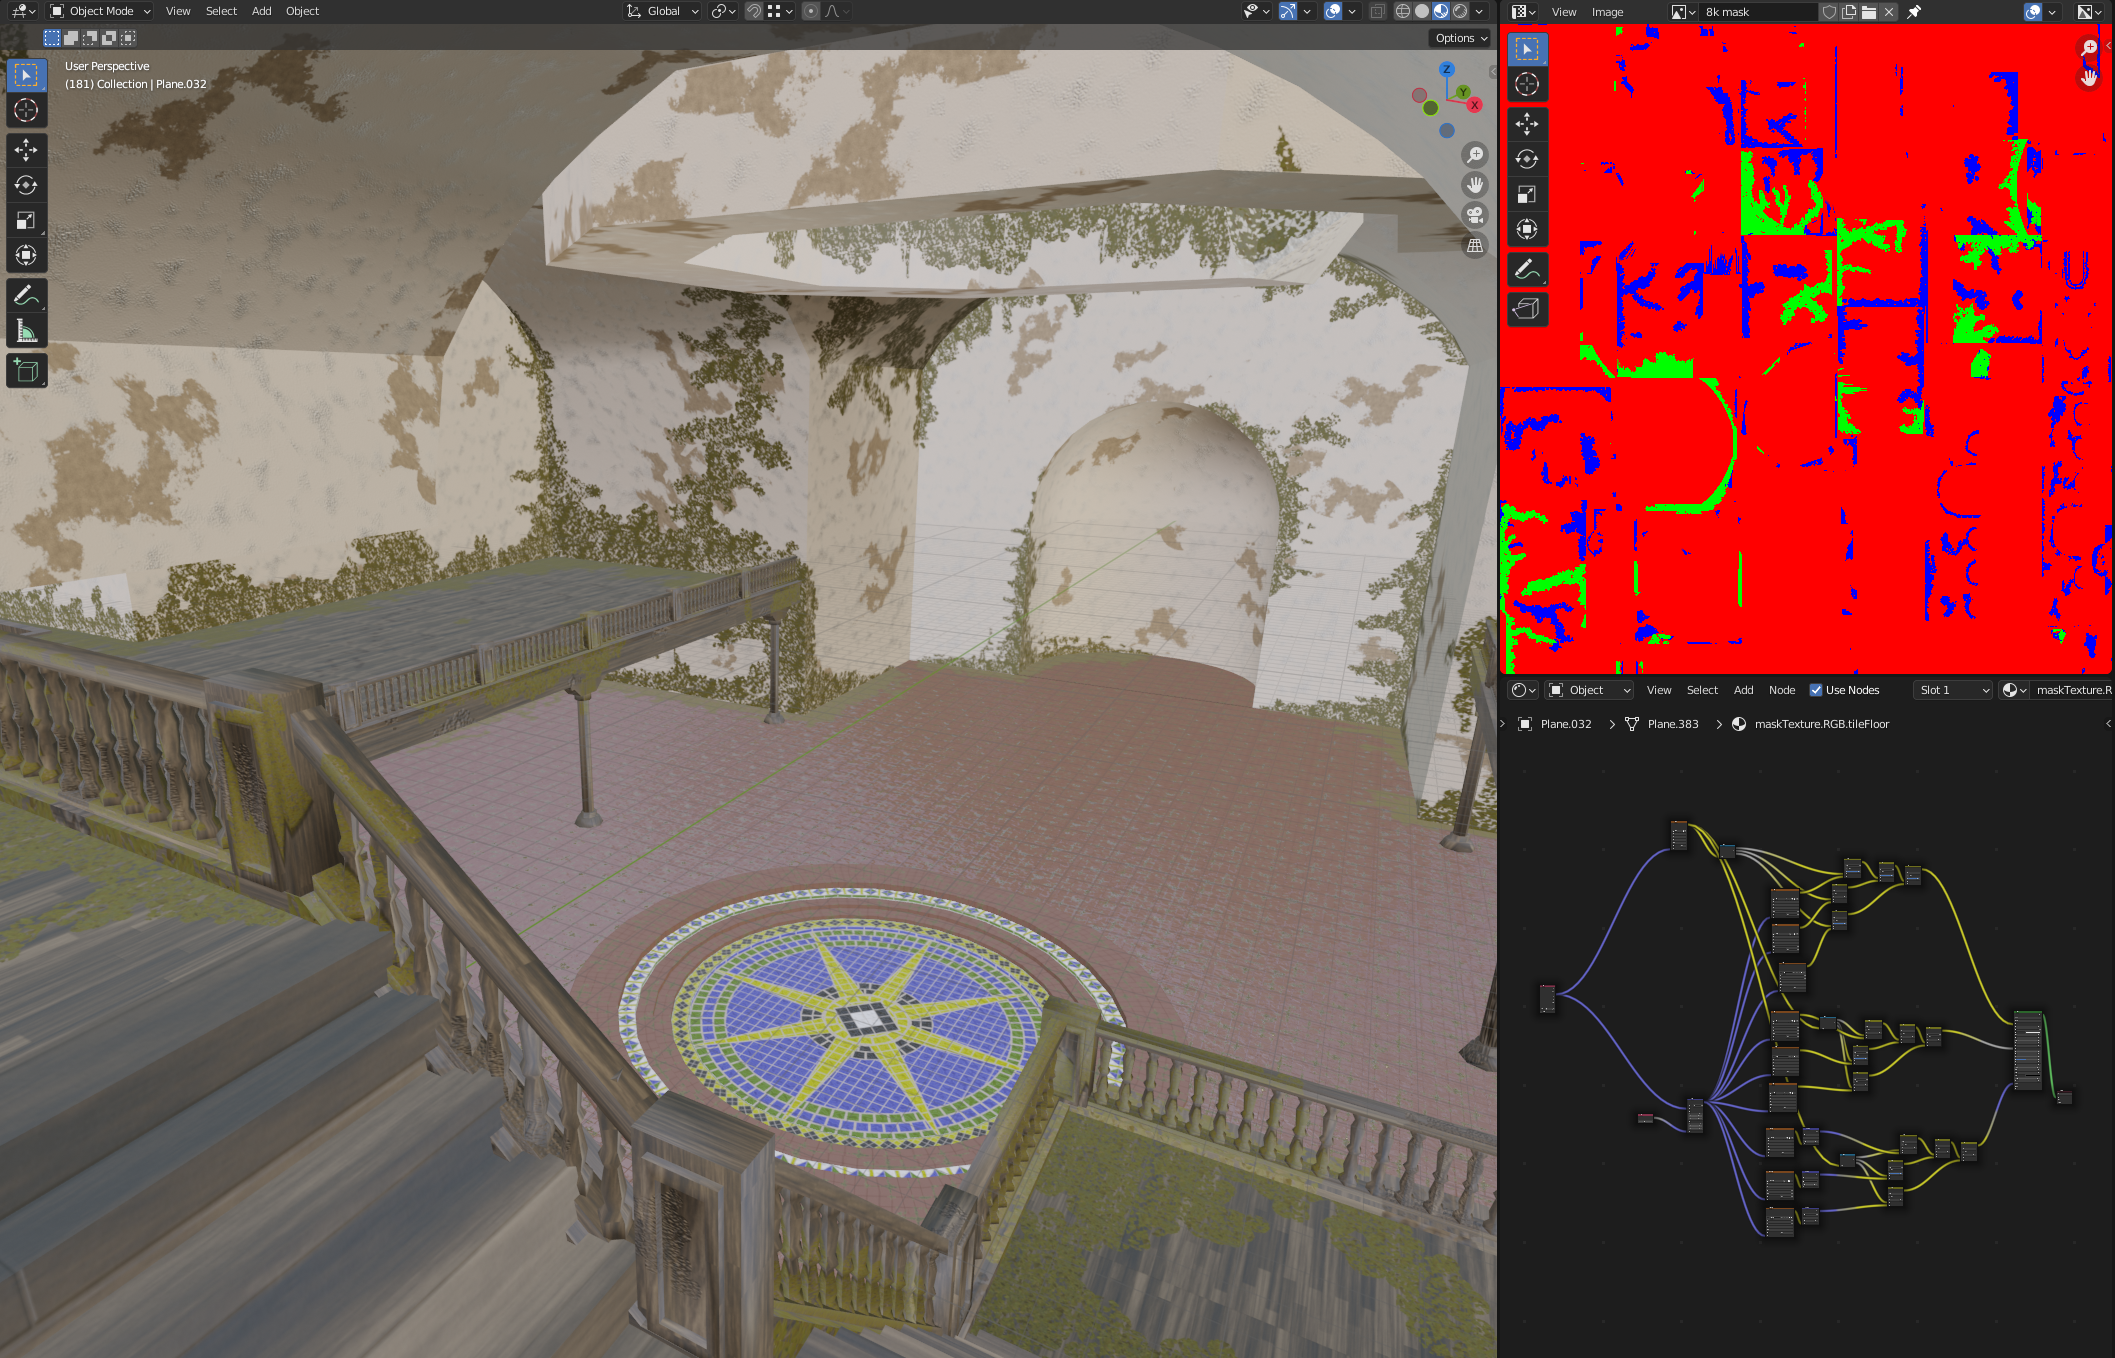
I’d been waiting to texture the hub area which had looked like this for a long time (left).
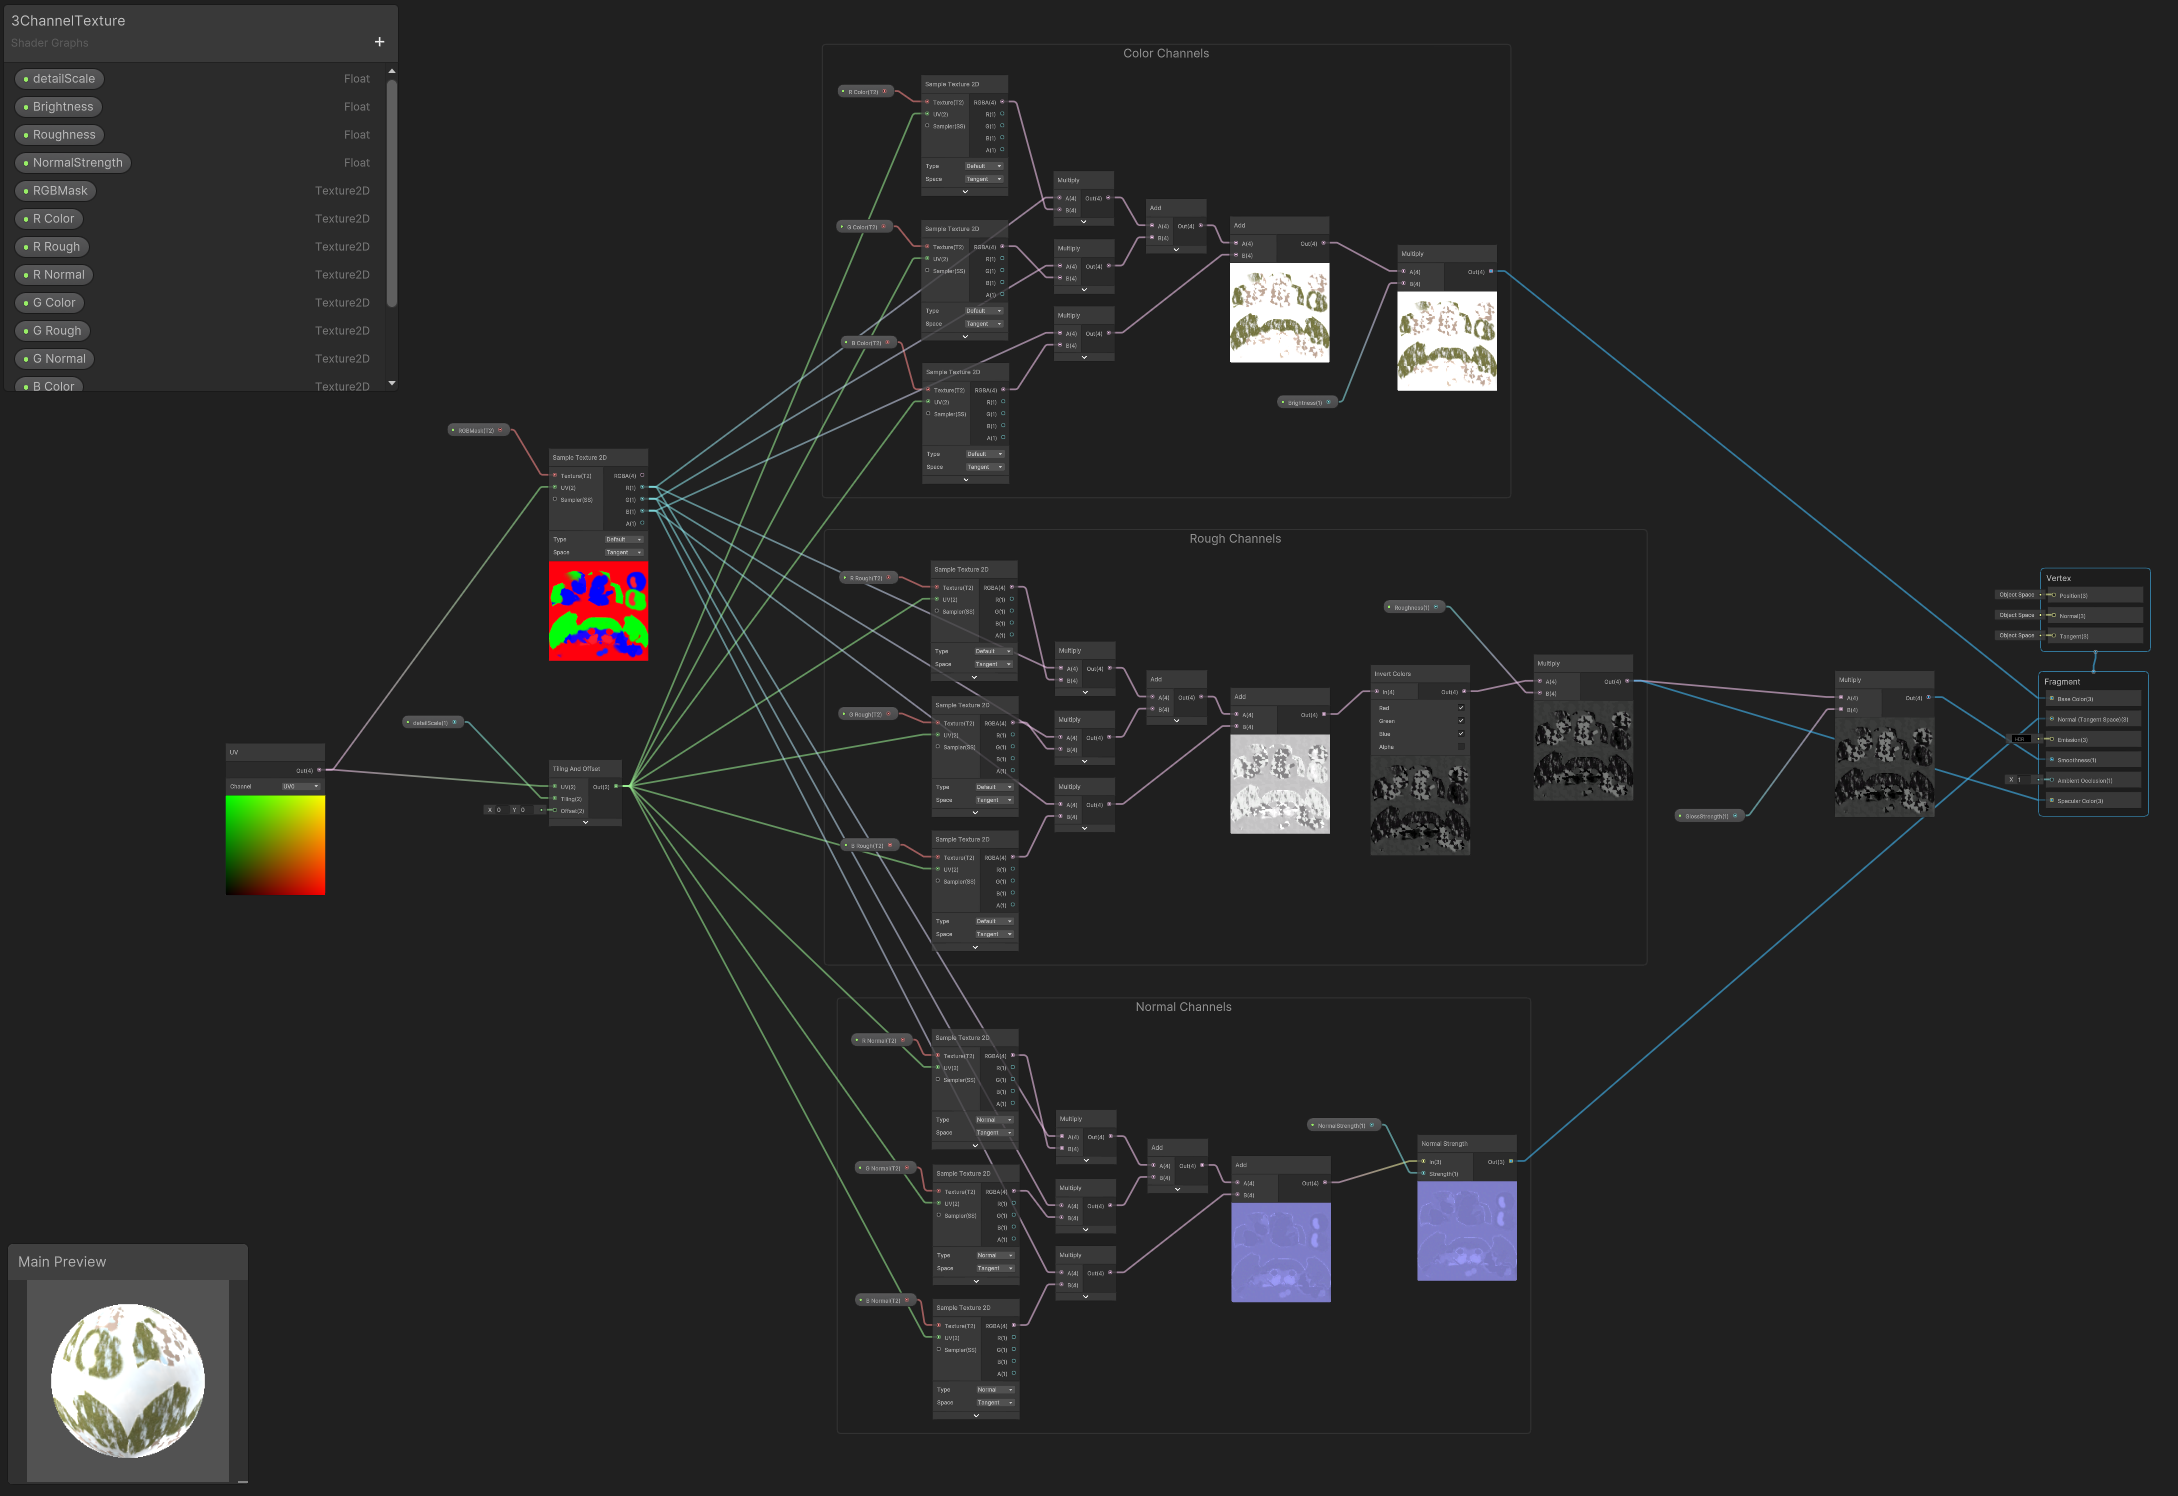
Since this seemed like the solution I was looking for I did some more research to figure out how it worked and learned it’s called a multi-channel shader. After a while I was able to make a URP shader in Unity that I could plug all the maps and textures I needed into.
After that I made some materials in Blender for the new textures I wanted the interior to have and baked a color, roughness, and normal map for each.
The issue that I quickly realized is that this process involves a lot of baking. I was planning on having a 3 channel interior wall, interior floor tile, interior wood panel, and exterior stucco texture. So already this is:
3 maps (color, rough, normal)
x 3 channels (Red - Regular, Green - Overgrown, Blue - Damaged)
x 4 materials (wall, exterior, tile, wood)
= 36 textures to bake
To get around some of this
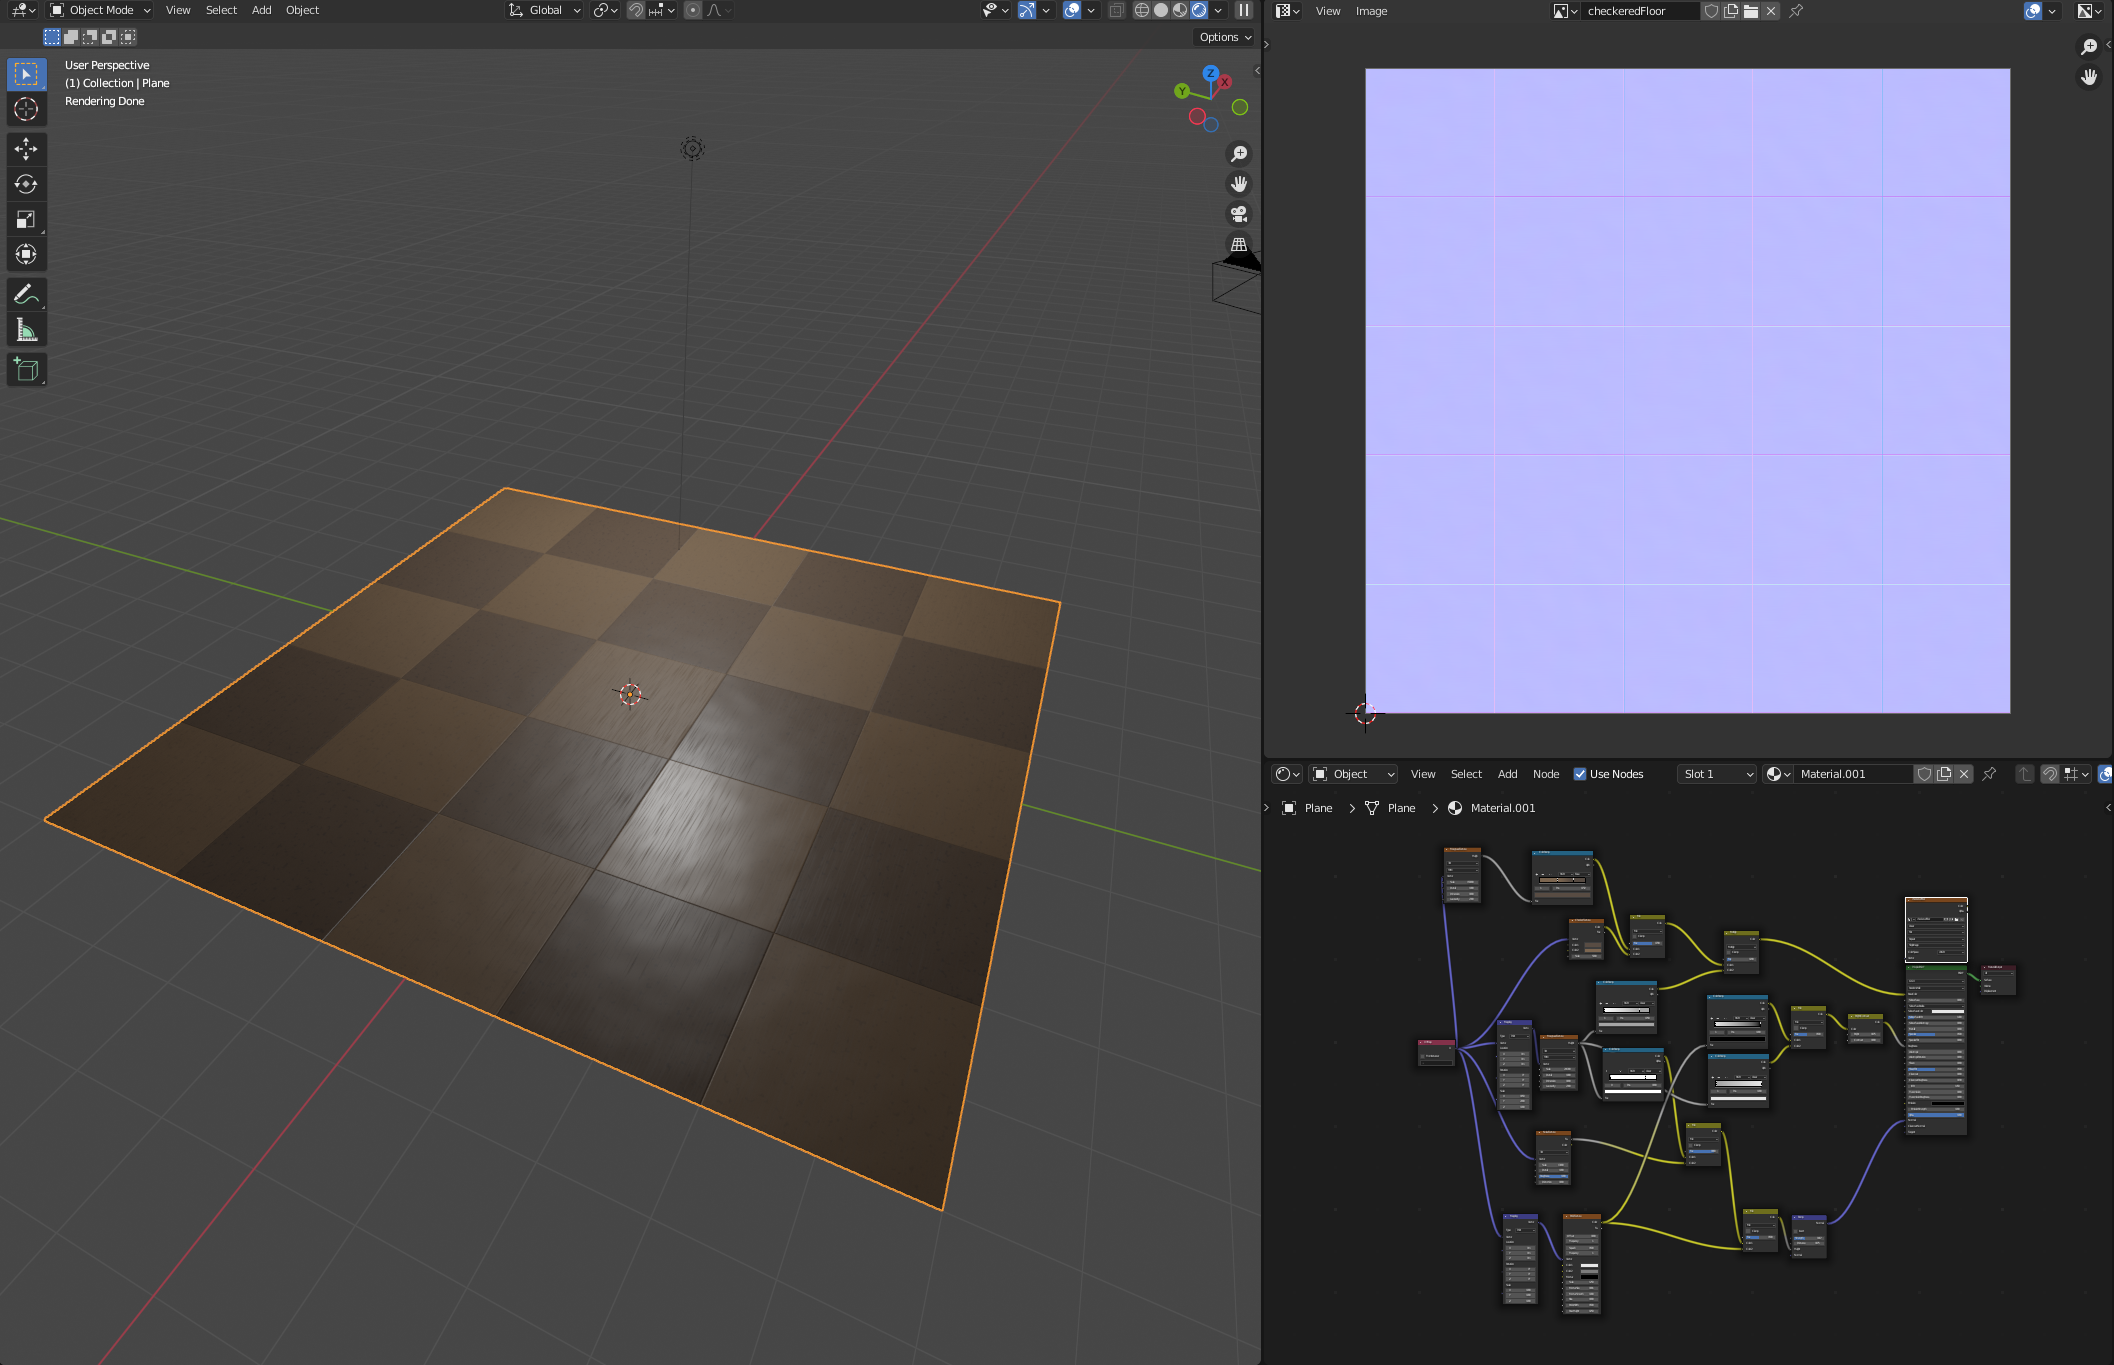
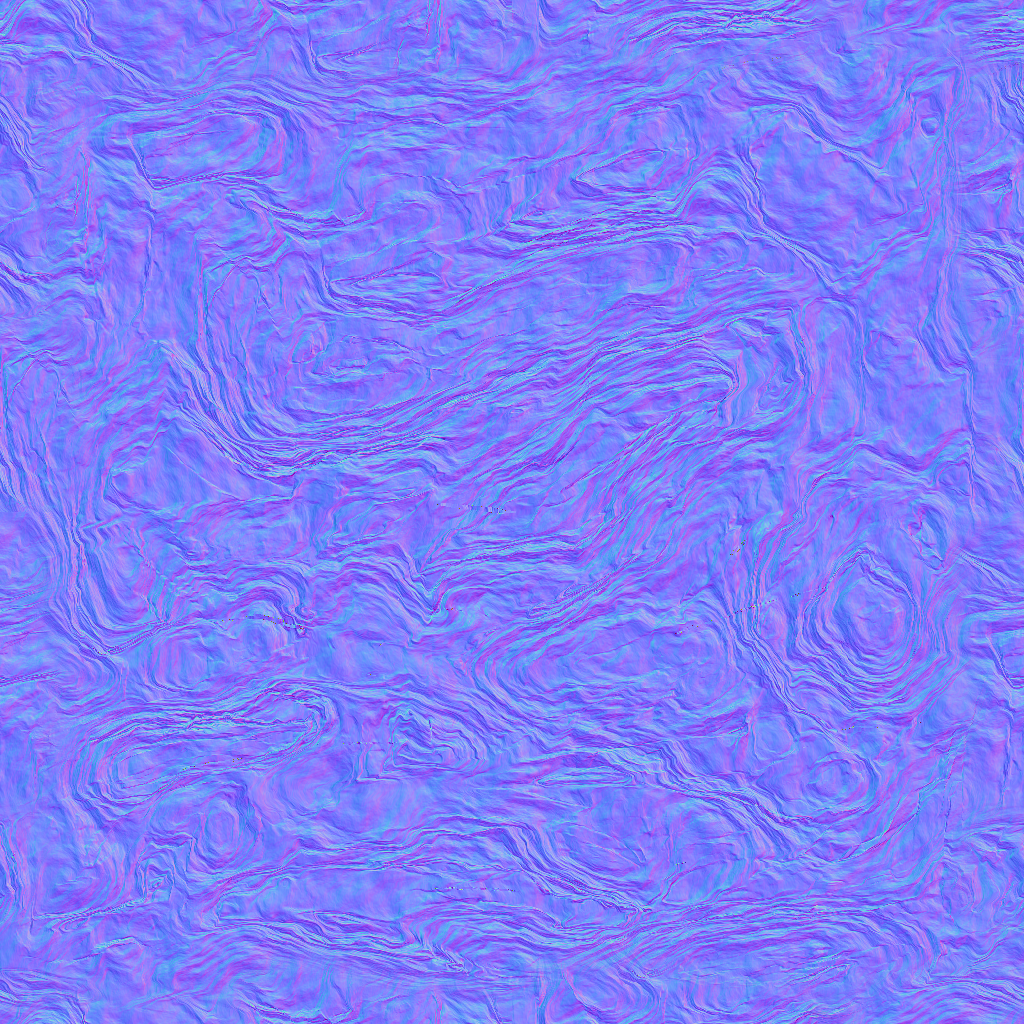
I found that the “damaged“ channel could use the same color and roughness maps as the “regular“ channel with the only difference being it’s normal map. Also the same normal map worked for all four materials I was making (right) which is just two noise textures of different scale layered on top of each other.
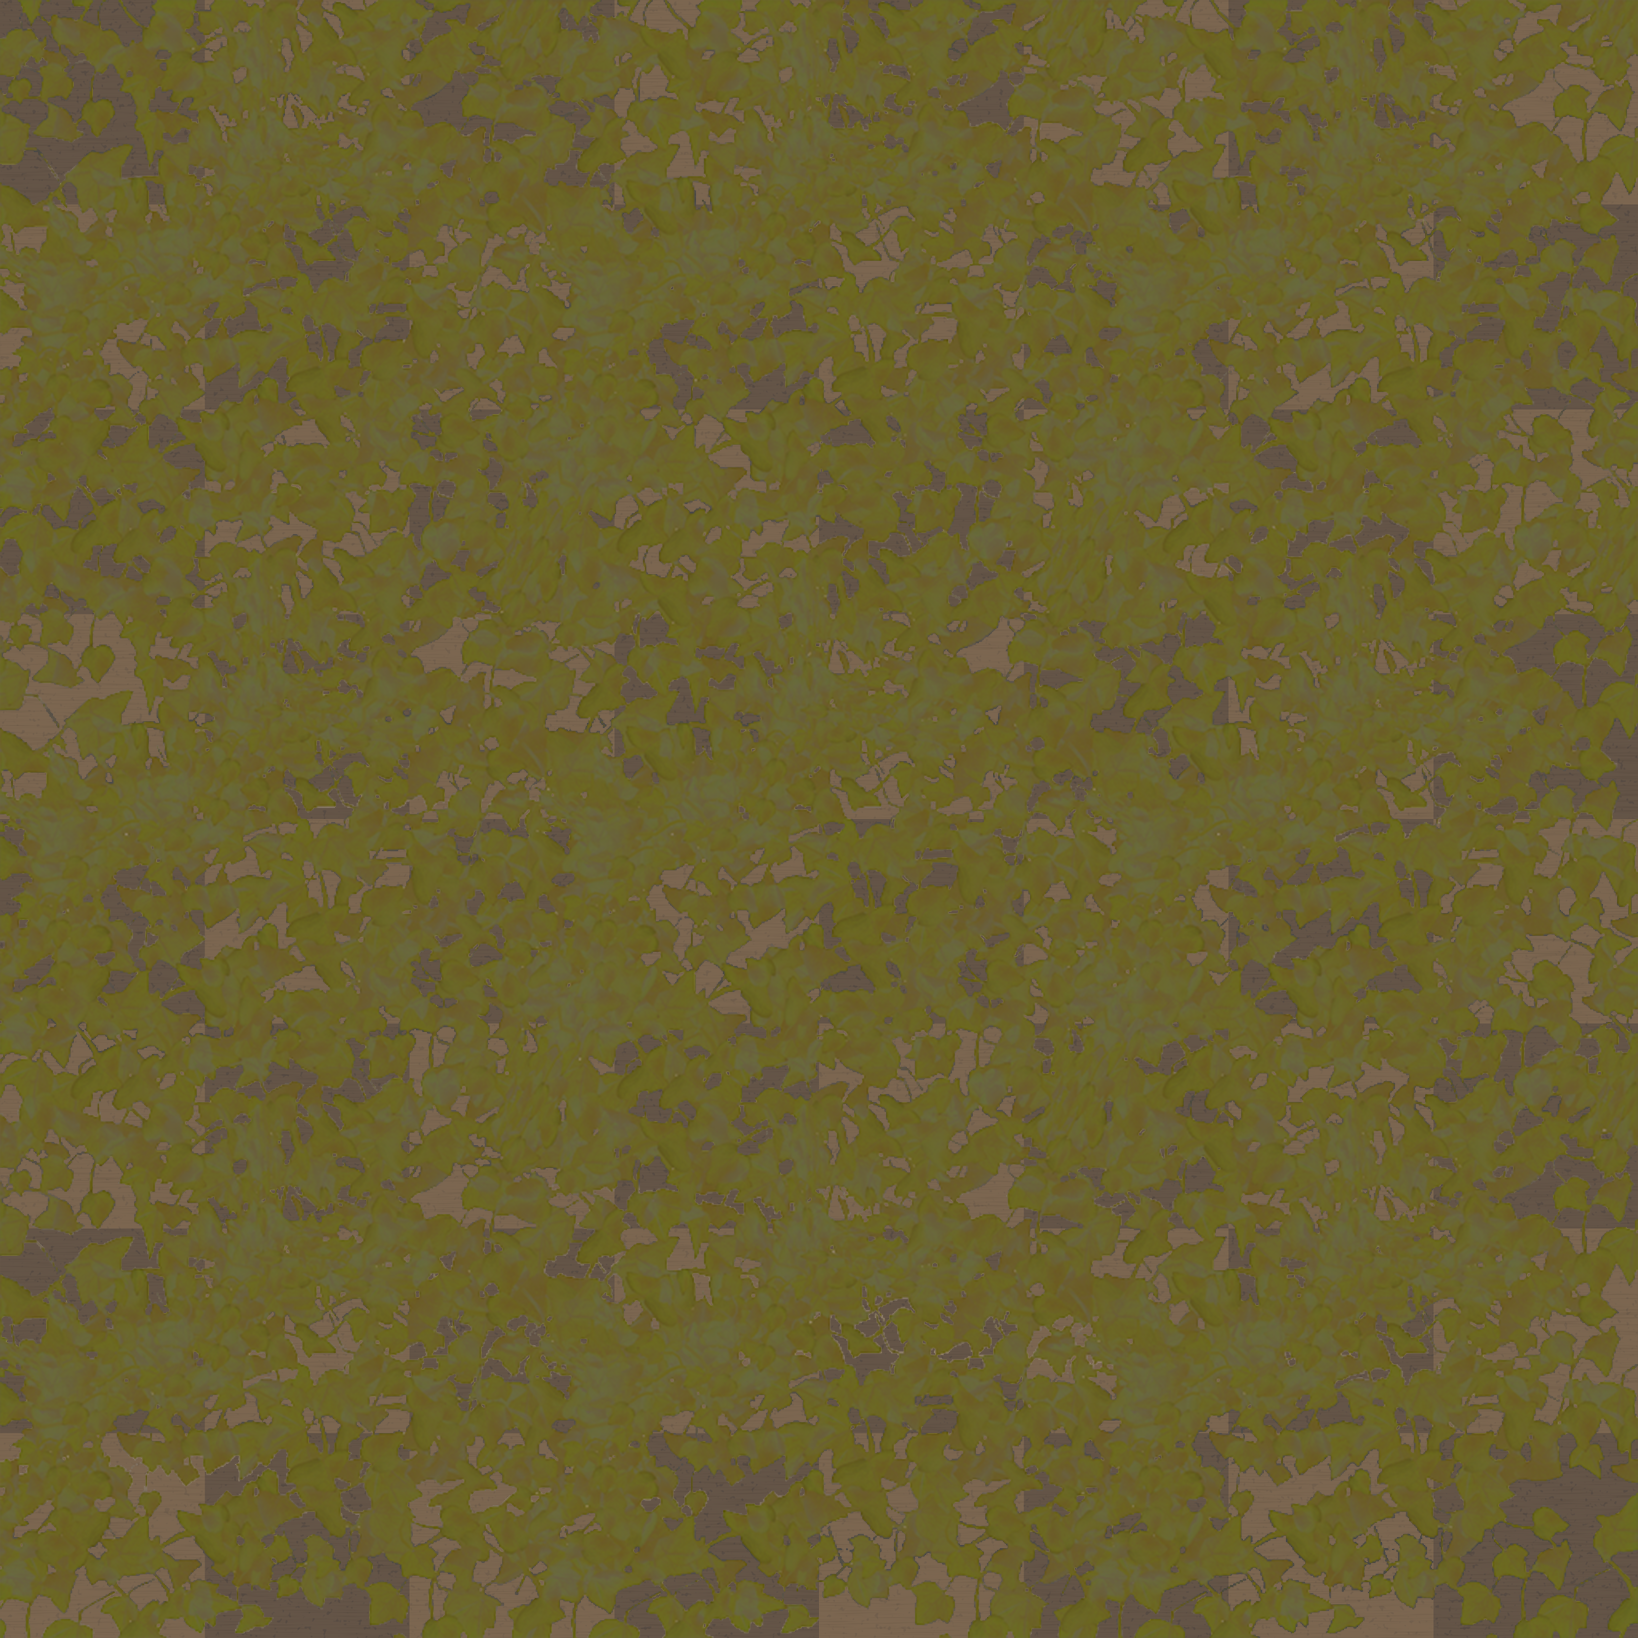
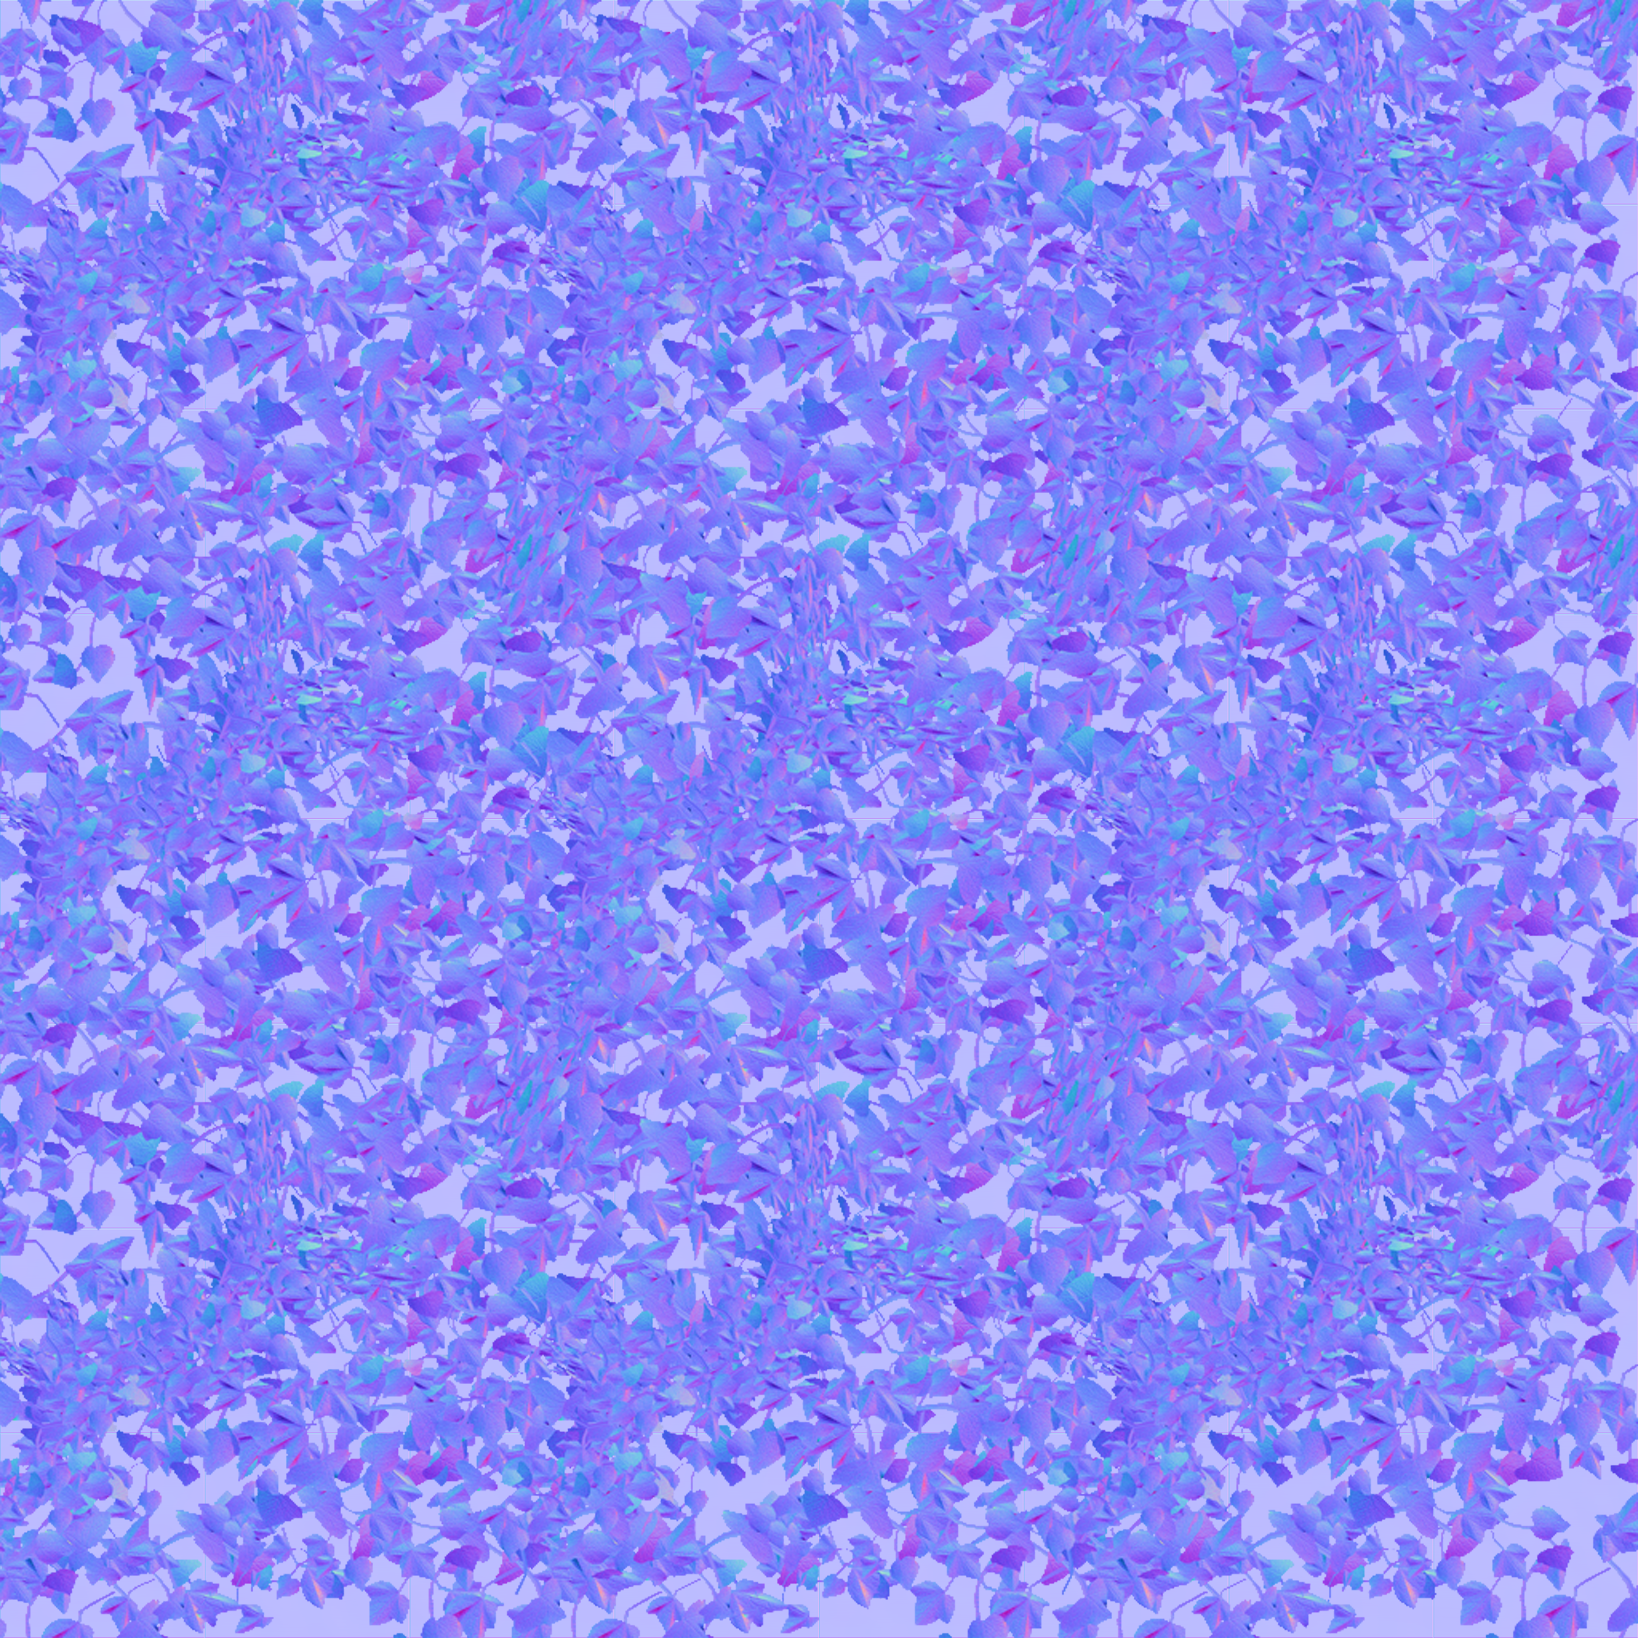
For the overgrown channel I modeled a network of vines that covered a square plane and baked a color, rough, and normal map with a transparent background. Then, in Photoshop I opened each map for my regular textures and pasted the respective overgrown map as a layer on top.
Therefore for each material I only had to bake the standard 3 maps while using the above methods for the other two channels (16 bakes total out of original 36).
Finally, with all my textures I was able to texture paint all the details into my scene in Blender like I’d seen in the video originally in order to create my RGB mask. I decided to make it an 8k image to minimize pixelation where the channels mix.
And below are the results!
The improved texture has a lot more detail and I’m much more satisfied with the look. If you look closely at some of the transitions between channels you can see pixelation so I’ll probably go back and make it so there’s a noise channel blending them in the shader but for now I think it looks fine. Will definitely continue to use this method for buildings throughout the game.
World Aligned Shader
Was watching a video about how AAA games texture objects in their large open worlds and found out about the concept of world aligned shaders. The benefits of which being that it helps blend together organic objects and ensure uniform texture scale independent of object or UV size. Wake has several areas with organic objects like cliffs and rocks so I decided to decided to give it a shot.
After some research I went into Blender and sculpted a rock surface.
Next I made a material for it that took the pointiness of the geometry I sculpted through a ColorRamp to make the crevices more dark and pop out more. While this worked I thought they came out too pronounced so I ended up tweaking the color map in Photoshop.
Once I had my finished model I baked out all the texture maps I needed. For the macro and detail normal maps I made two simple new materials that had the detail I wanted the rocks to have visible up close and from a distance.
Color Map
Roughness Map
Macro Normal Map
Normal Map
Detail Normal Map
Last thing I did in Blender was to model a rock for the texture to go on which I then decimated twice to generate a LOD1, LOD2 & LOD3 model.
Shifting back over to Unity I made a world-aligned texture URP shader. The main difference from other shaders I’ve made was using the “Absolute World“ instead of UV vector on the Position node. However I noticed the texture stretching on the y-axis at first so I added some nodes which split and stitch sections of the texture based on their absolute world normal value.
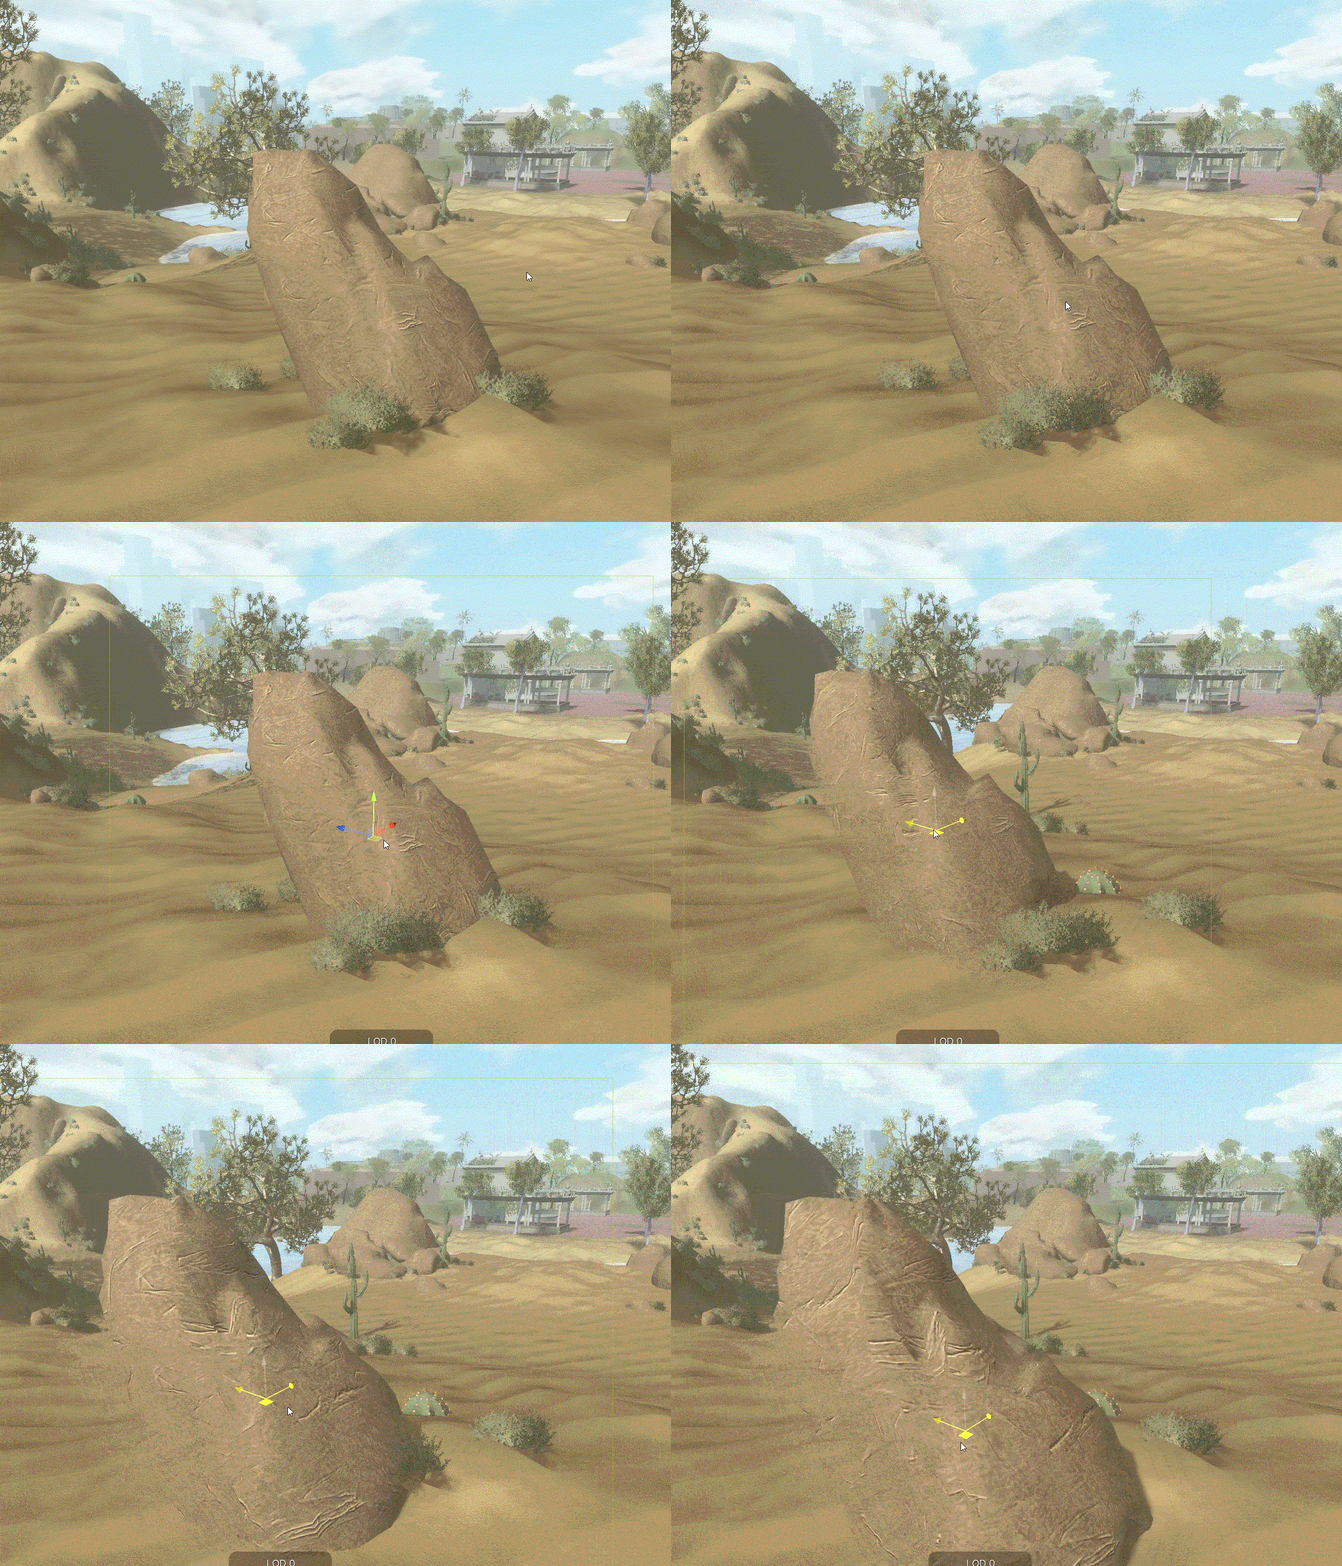
The result was a texture applied to my object that shifted around based on it’s world position.
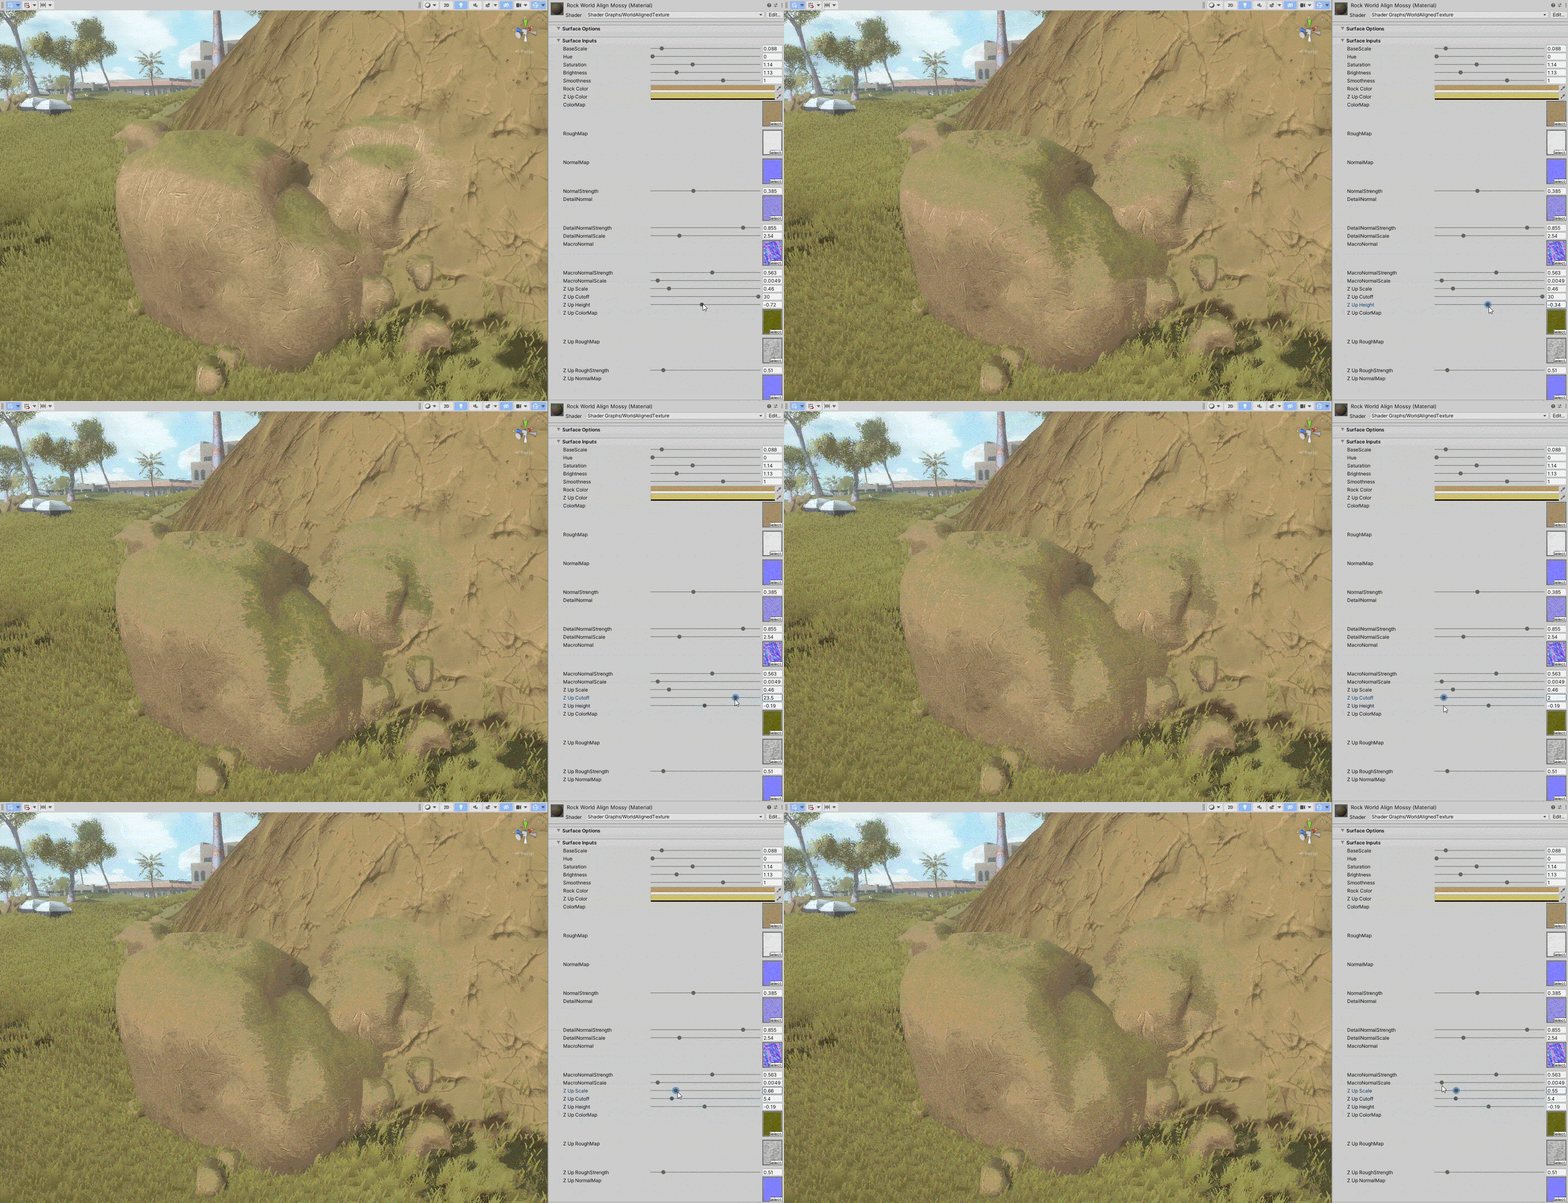
While I was looking into world aligned textures I saw that you can add a second world aligned texture that appears above a specified local y-position or a Y-Up Shader. Since I’d gotten this far and wanted to make a moss covered rock for the more lush areas I added another swath of nodes to my shader.
The shader now takes the world y-position of the object, applies a noise texture and multiplies that with the moss textures. Then it takes the inverse of the noisy y vector and multiplies that with the rock texture I had. Finally the moss and rock halves are added back together and we get the finished result.
On the material in the editor you can adjust the colors of the base and y-up texture, the y cutoff (sharp or gradual) and the y position.
Furniture Assets
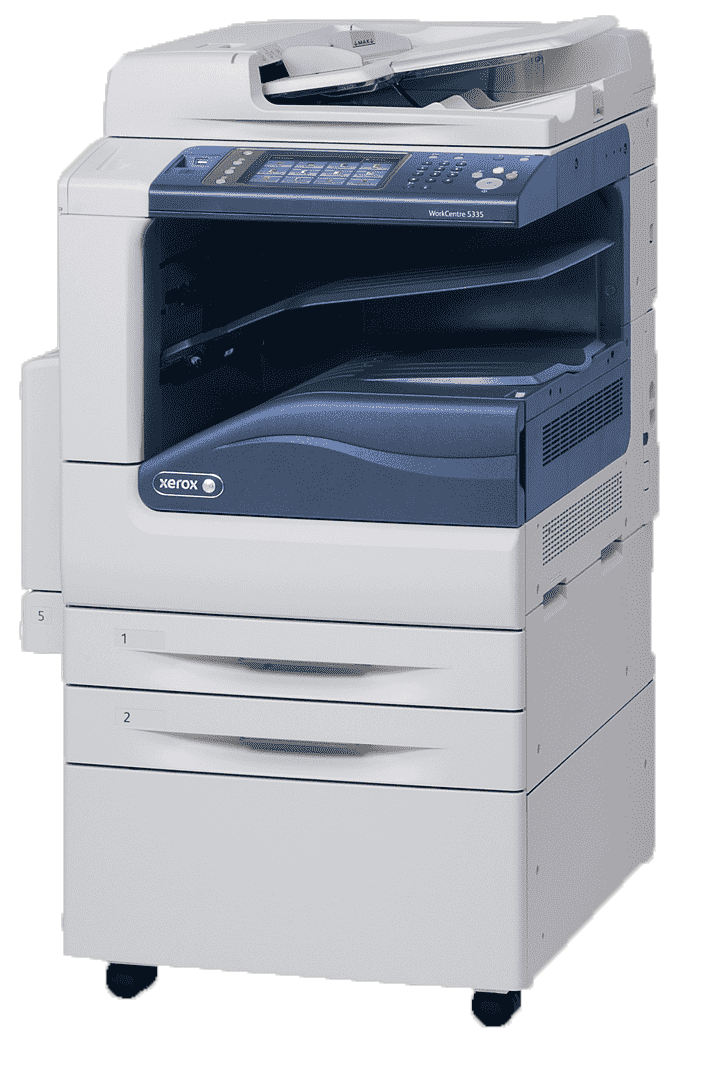
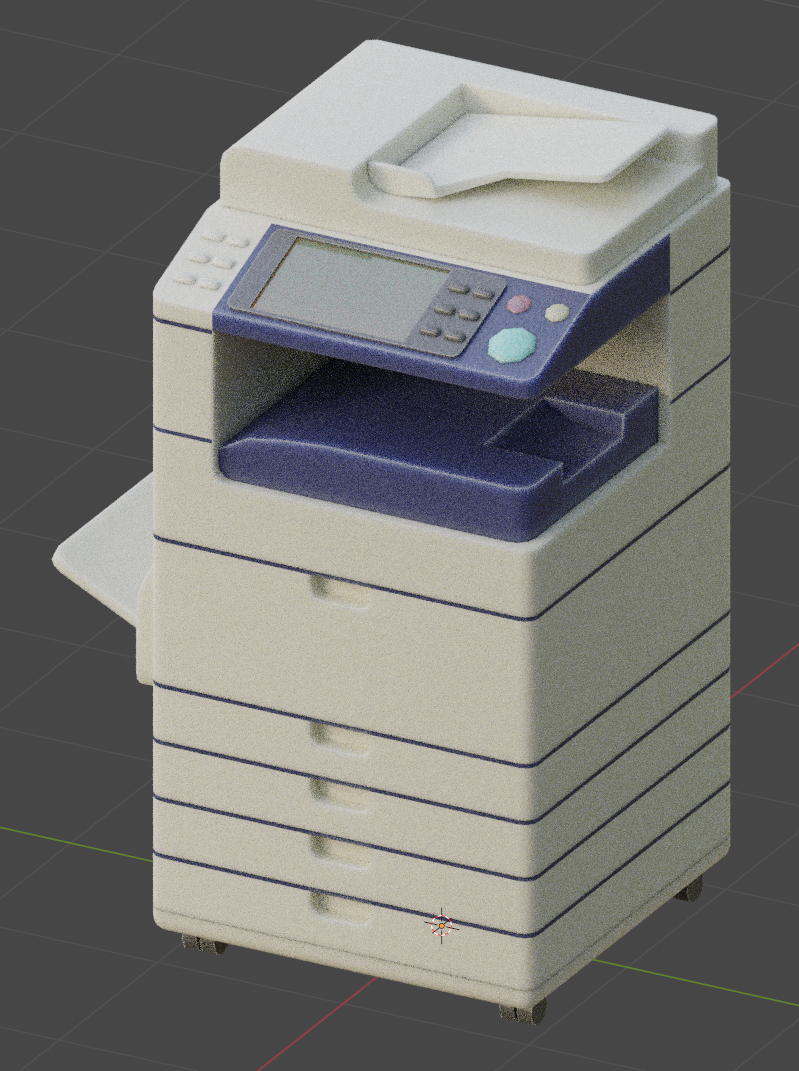
A large chunk of Wake takes place in sunken abandoned office buildings that the enemy faction has taken over for their base of operations. To populate them I have been modeling, texturing and baking office furniture. Most recently was a copy machine.
Whenever I’m making assets, the first step is finding reference which I like to collect on a PureRef board:
After I have my reference it’s time to model. This one wasn’t super challenging especially since the style I’m going for isn’t meant to be super detailed.
Left to right: wireframe with tri-count (Blender), rendered view (Blender), in-game view (Unity)
My material node set-up in Blender is pretty simple as well although recently I’ve been using a subsurface effect to add a slight stylistic detail that lightens edges (look at the edges of the blue plastic above) which works much better than using the pointiness output from the geometry node especially on a low poly model.
Baked color, roughness and normal map
Once I have my model in-game I want it to be able to be knocked around by explosions or the player attacking it without behaving too wonky. To do this, I add a rigid body component with isKinematic checked and a box collider component. Then I add a script I wrote that ascribes elemental behavior as well as the following code:
This way, the rigid body activates only if the object collides with a game object collider that would trigger damage (layers 8, 16, 17). Then as soon as the object settles, the rigid body deactivates again preventing it from jittering, bouncing against other rigid body objects, clipping through the floor, etc.
Example of “breakable” script in action.
NPC Dialogue
One of the big steps towards creating friendly NPC’s was adding the ability for the player to talk to them. To achieve this I wrote the following code:
To break it down, dialogue[] is a serialized array that lets me add as many sets of dialogue as there are Time of Day locations for each NPC. I wanted to make sure I could write each character’s dialogue within their respective game object in the editor rather than within the script to prevent unnecessary length of code and make it easy to add/edit dialogue. When writing dialogue, each segment of an encounter’s dialogue is separated by a semicolon. The string is split up and put into the dialogueSegments[] string array.
Then if the player is close enough and presses the A button (I use an old Xbox 360 controller while developing Wake), the dialogue canvas renderer activates along with the speaker’s name.
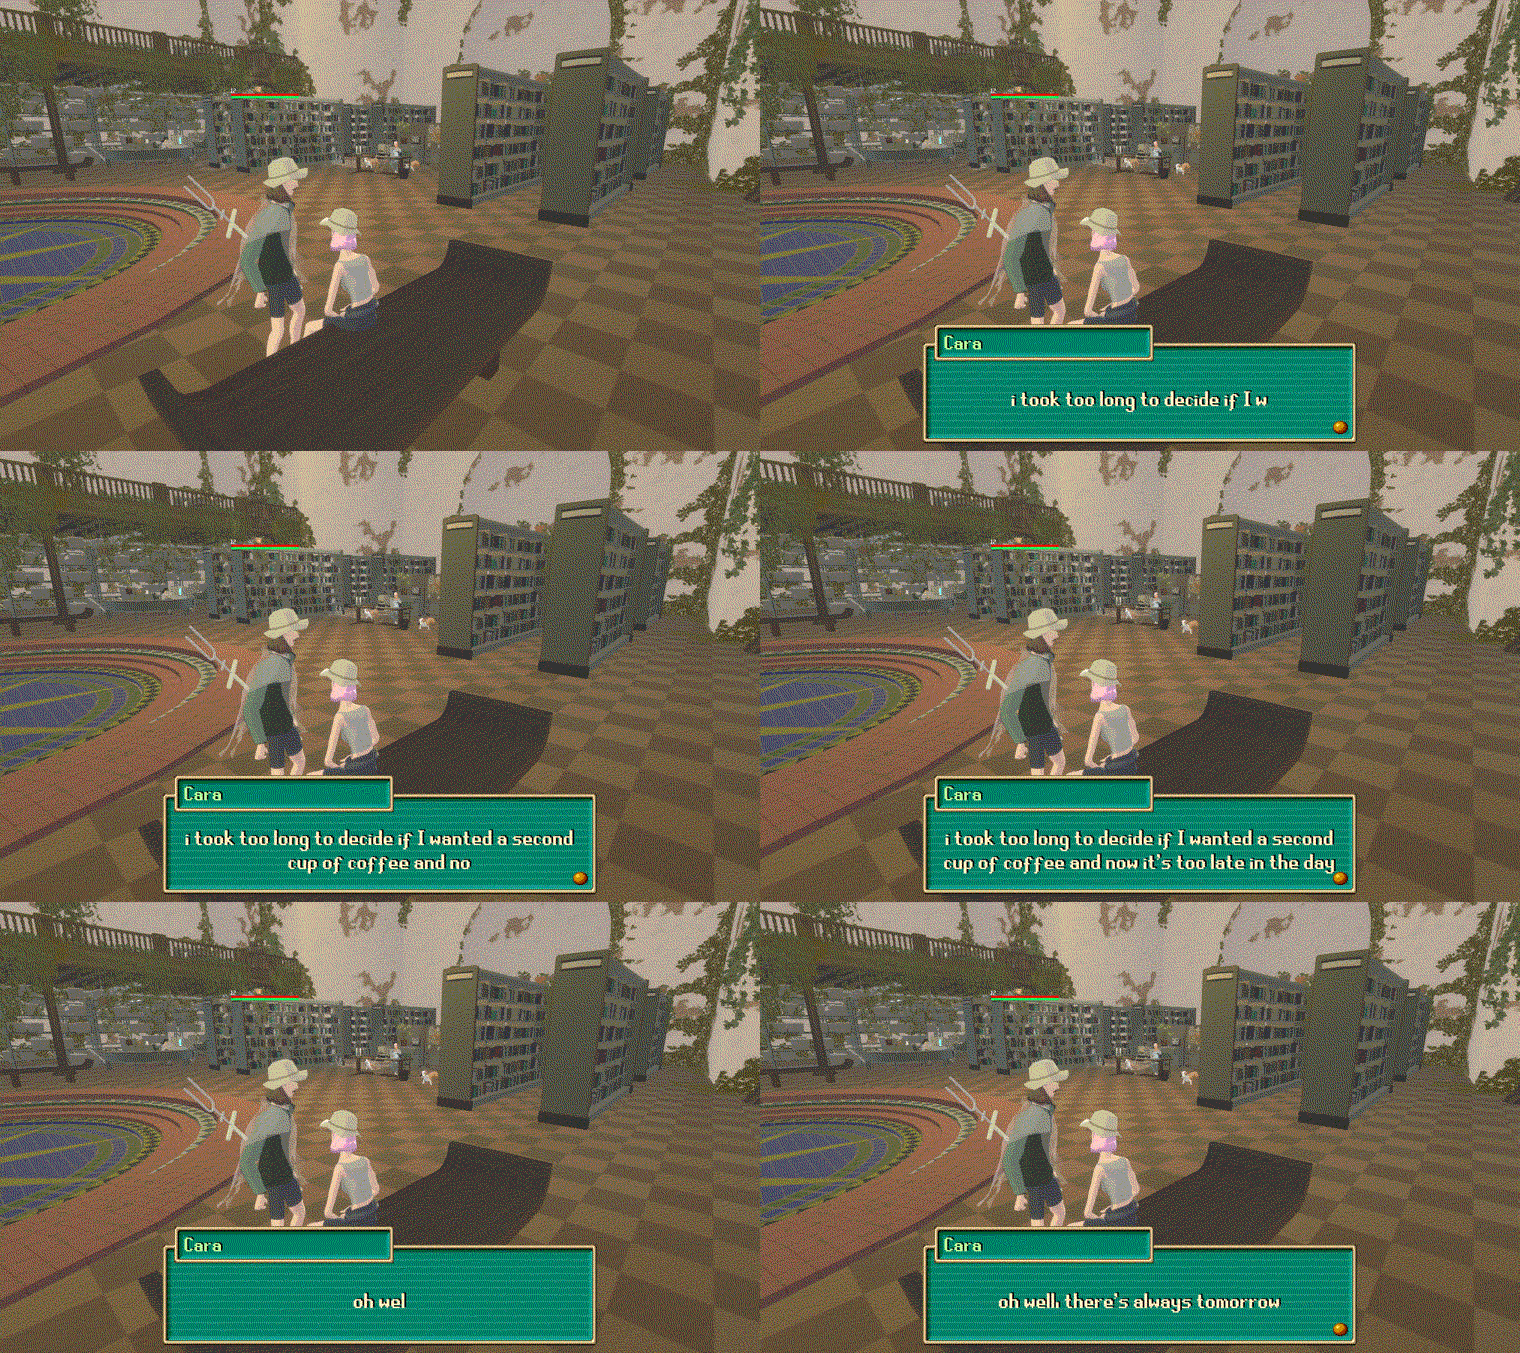
Once the dialogue box is up, the script starts typing out the first string in the dialogueSegments[] array using the TypeDialogue() function. The characters are appended every .05 seconds to the typedDialogue string to give the appearance of the text being typed at a similar speed that the words would be spoken. Outside the TypeDialogue() function, after a second the player can press A to skip to the next segment of text. If the player steps away from the NPC or there’s no more segments of dialogue, the dialogue box deactivates and the conversation is over.
And you can see the results above! I’ll probably change the dialogue box design and font completely but am satisfied with how it works. My favorite aspect is how easy it is to add or write dialogue for each character within the editor. Next I want to add response options for the player, the ability to open a shop or storage window, and the ability for the game to remember whether you’ve completed a dialogue.


